The Beginner’s Guide to Organizing Your Kitchen Cabinets
This post contains affiliate links. If you click a link and make a purchase, I may earn a small commission at no extra cost to you. I only recommend products I genuinely believe in. Thank you for supporting The Tender Home!
There’s a specific kind of frustration that happens when you’re trying to cook dinner and the pan you need is buried under three other pans, and a lid falls out, and you catch it before it hits your foot, and you stand there for a second thinking — there has to be a better way.
There is. And it doesn’t require a kitchen renovation, a label maker addiction, or spending a Saturday watching organization videos on YouTube.
What it requires is a system — a logical way of deciding what lives where, and a few targeted products that hold everything in place once you’ve made those decisions. A well-organized kitchen cabinet isn’t a personality type or a privilege for people with naturally tidy instincts. It’s the result of applying a few principles consistently. And once you’ve done it, the cabinet stays organized with almost no effort because you’ve removed the conditions that created the chaos in the first place.
If you’re wondering how to organize kitchen cabinets effectively, this guide will help you achieve the best results.
This guide walks you through every type of kitchen cabinet, one at a time, with a clear method and specific product recommendations that make the difference between organized for a week and organized for good.
Before you organize anything, declutter first. Pull everything out of one cabinet at a time and get rid of anything expired, broken, or unused in the last year. Organizing around clutter just hides it — and it all comes back out within a month. Read: How to Declutter Your Home in One Weekend →
What’s in this guide
The golden rule: zone by use
The reason most kitchen cabinets become chaotic is that things get put away by where they fit, not by where they’re used. The coffee mugs end up three cabinets from the coffee maker. The cutting board lives across the kitchen from the knife block. The baking supplies are split between two different cabinets on opposite sides of the room.
Zone by use means every item lives as close as possible to where you use it. Coffee station items near the kettle and coffee maker. Cooking tools near the stove. Plates and glasses near the dishwasher. Snacks and lunchbox supplies near where you pack them.
This sounds obvious. It changes everything. When things have a logical home that makes spatial sense, you put them back automatically without thinking about it — and the cabinet stays organized without any conscious effort on your part. The system does the work instead of your willpower.
Before you reorganize a single cabinet, walk through your kitchen and identify your zones: cooking zone (near the stove), prep zone (near the counter and cutting board), coffee/breakfast zone, dishes zone (near the dishwasher), and storage zone (pantry items and less-used appliances). Every reorganization decision you make should serve these zones.
Before you start: the full empty-out method
You cannot organize a kitchen by moving things around inside it. Everything has to come out — all of it, spread across the counter or table — before you put anything back. This is the step people resist most, and the reason most kitchen reorganizations fail within a month.
Work one cabinet at a time so you don’t overwhelm yourself or lose track of what belongs where. For each cabinet:
- Pull everything out completely. Wipe down the shelf.
- Sort into three groups: keep, donate/trash, and ‘does this even belong in this cabinet?’
- Check expiry dates on anything food-related. If it’s expired, it goes without negotiation.
- Ask: do I actually use this? A gadget you’ve used twice in two years is not worth the cabinet space it costs you every day.
- Put back only what belongs in that zone — everything else gets relocated or removed.
The physical act of removing everything from a cabinet forces you to make an active decision about each item rather than letting inertia keep it in place. Things that have lived in the same spot for three years without being used finally get evaluated on their own merits.
Upper cabinets
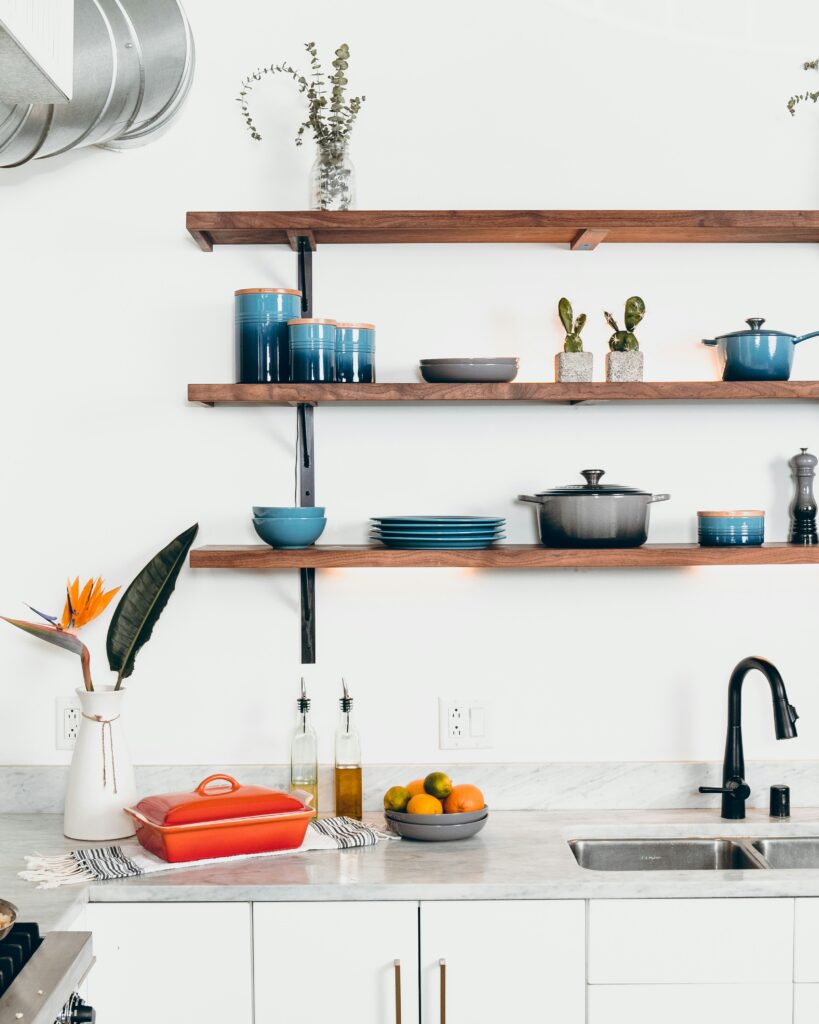
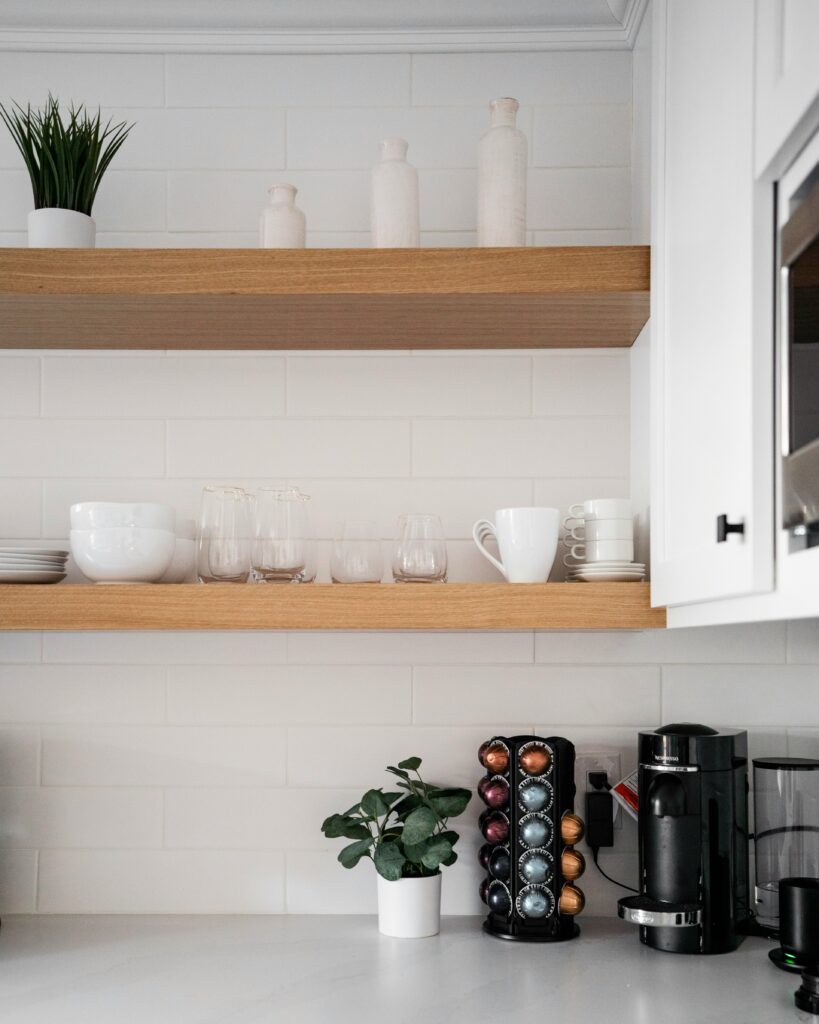
Plates, bowls, and glasses
Stack plates in descending size order — largest at the bottom, smallest at the top. This is the most stable stacking arrangement and also the most accessible, since the plates you use most (probably not the serving platter) end up on top. If you have two sets of dishes, the everyday set lives in the most accessible cabinet at eye level. Seasonal, occasion, or decorative dishes go higher up or in harder-to-reach cabinets.
For glasses, line them up in rows with the same type together — tall glasses at the back, short glasses at the front. If your glasses are toppling into each other or you’re stacking them inside each other and scratching the bases, a cabinet shelf riser creates a second tier without wasting the vertical space above the first row. You essentially double your glass storage in the same footprint.
One honest note on dishes: most people own far more than they use. If you have eight place settings and regularly cook for two, you have six sets of dishes taking up space for occasions that may come three times a year. Keep a set of four plus two overflow pieces — everything else can go.
Mugs — the great cabinet space wasters
Mugs accumulate at a rate that exceeds any reasonable consumption of hot beverages. They arrive as gifts, as hotel souvenirs, as promotional items, as impulse purchases on holiday. Twelve mugs for two people is nine too many.
The edit: keep the ones you actually reach for — the ones you wash immediately when they’re dirty because you don’t want to use a different one. Everything else is a candidate for donation. A mug you feel guilty getting rid of because it was a gift is still taking up space every single day that guilt isn’t.
Once you’ve edited down, a mug hook strip mounted inside the cabinet door keeps mugs accessible without consuming shelf space at all. This frees an entire shelf for other items.
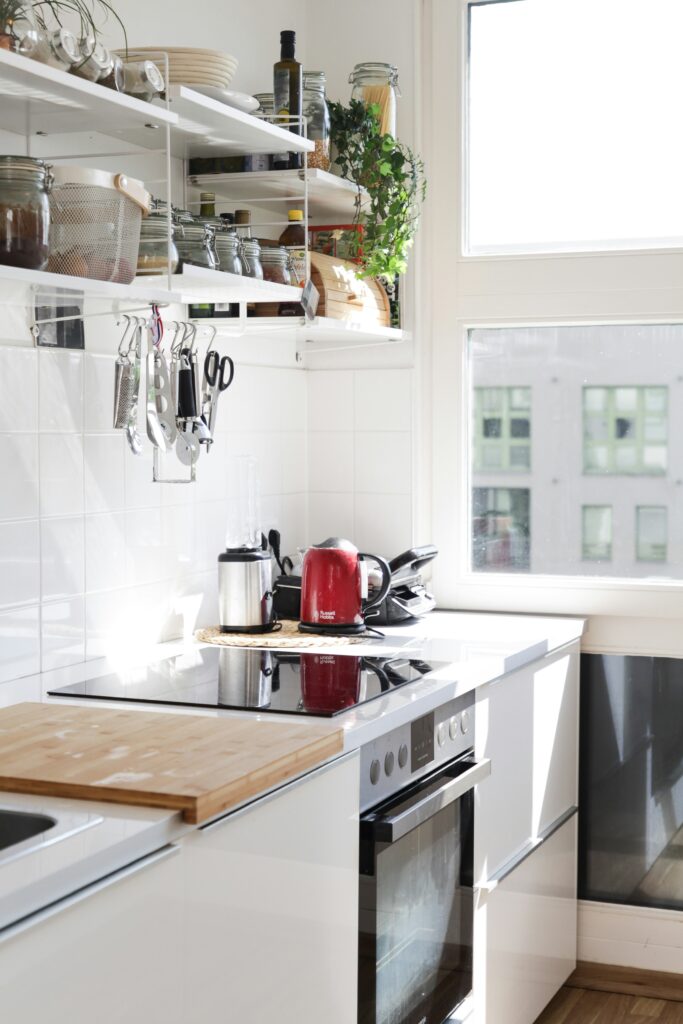
Spices — the organization problem nobody talks about
The worst place for spices is behind the stove — heat and steam degrade them faster and reduce both shelf life and potency. The second worst place is in a deep cabinet where they get buried three rows back and forgotten until you find them two years expired.
The best arrangement depends on your kitchen layout: a dedicated spice cabinet with a tiered insert that makes every jar visible at once, a drawer near the cooking area where spices lay flat with labels facing up, or a small cabinet shelf riser that creates two visible rows of jars.
Alphabetical order sounds fussy but saves real time when you’re mid-recipe. The alternative — searching through twenty jars to find the cumin — is less efficient than it sounds until you’ve done it a hundred times.
Check every spice you own right now for the best-by date. Spices don’t spoil in a way that makes you sick — they just stop tasting like anything, which is arguably worse. If it’s over two years old, it’s probably already costing you flavor.
Lower cabinets
Pots and pans — the lid problem
Pots and pans are the most common source of kitchen cabinet chaos, and almost entirely because of lids. The pots themselves stack reasonably well. The lids do not — they’re round, they slide, they fall, and they take everything down with them when they go.
The solution that actually works: separate the lids from the pots entirely. A vertical pot lid organizer mounted inside the cabinet door holds lids upright, accessible, and completely out of the way of the pots themselves. [Pot lid organizer — Amazon link] The pots stack cleanly on the cabinet floor without lids involved.
If your lower cabinets are deep and you’re constantly removing three things to get to the fourth, a pull-out cabinet organizer on a sliding rail solves this permanently. It’s the single most functional upgrade for a deep lower cabinet — everything comes to you instead of requiring excavation.
An honest audit question for the pots-and-pans cabinet: how many pans do you actually cook with regularly? One small pan, one large pan, one pot, one large pot, a baking sheet, and a Dutch oven covers about 90% of home cooking. Everything else — the wok you’ve used twice, the pan that lost its non-stick coating two years ago, the pot that’s slightly too small for pasta — is taking up space and making the cabinet harder to use every day.
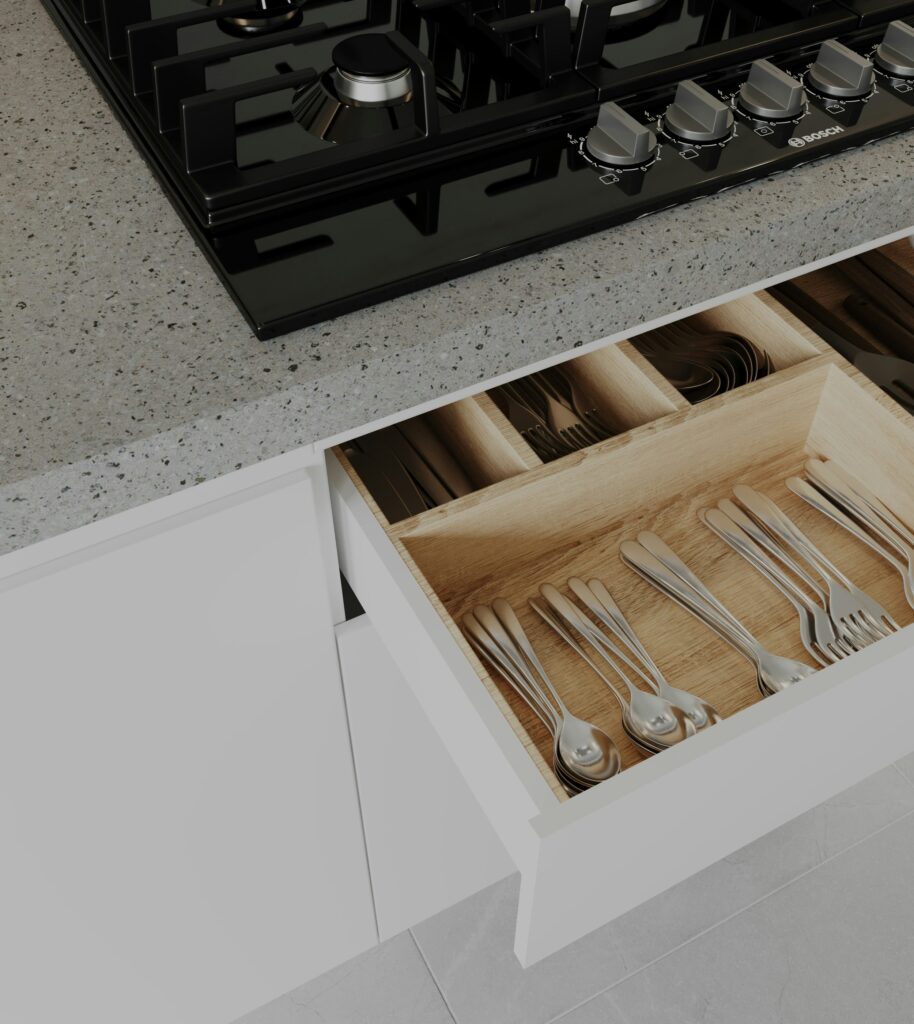
Food storage containers — the lid matching game ends today
Mismatched food storage containers are a universal experience. The lids and containers multiply independently, mate with incompatible partners, and produce offspring that fit nothing. By the time most people open this cabinet, they’ve given up finding a matching set and just stack everything in a cairn of optimism.
The permanent fix requires a small investment and one afternoon: switch entirely to a single matching set of stackable containers with universal lids. When everything is the same brand, lids and containers are interchangeable and stack cleanly in a fraction of the space. Donate or recycle the existing collection in its entirety.
Store containers with lids on — not stacked inside each other with lids in a separate pile. The stacked-inside-each-other method saves about 20% space while costing 100% of your sanity when you’re looking for a specific size at 7pm on a Tuesday.
Baking supplies — vertical is the answer
Baking sheets, muffin tins, cooling racks, and cutting boards share an organizational problem: they’re flat, they stack awkwardly, and removing one from the bottom of a stack requires removing everything above it first.
A vertical baking sheet organizer stores them upright like files in a filing cabinet — each one individually accessible without disturbing any of the others. Place it in a lower cabinet near the oven and you’ll never have to perform the baking sheet avalanche maneuver again.
This same principle — vertical storage — applies to cutting boards, cooling racks, and pan dividers. A simple tension rod or divider panel inside a cabinet creates individual vertical slots for each item. Cheap, highly effective, and one of the fastest organization wins in any kitchen.
The corner cabinet problem
Corner cabinets are the black holes of kitchen storage — deep, awkward to access, and architecturally designed to lose things. The back-left section of a corner cabinet might as well not exist for most home cooks.
Two solutions that actually work:
A lazy Susan turntable ($8–$25) sits inside the cabinet and rotates, bringing everything to the front as you spin it. Perfect for oils, vinegars, condiments, and smaller bottles that get lost in corners. The investment is minimal and the improvement is immediate — what was previously inaccessible becomes fully reachable in one spin.
A pull-out corner organizer ($60–$100) is a larger investment but comprehensively solves the corner cabinet by extending outward when you open the door. Every item is accessible, nothing gets lost, and the cabinet earns its keep properly. Worth the investment if the corner cabinet is a prime location that you open every day.
Under the sink
Under the sink is prime real estate that almost everyone treats as a dumping ground. The challenge is the plumbing — the pipes break up the space and make standard shelving completely useless in the deeper sections.
An adjustable under-sink organizer works around the pipes and creates two tiers of usable storage. Group cleaning products together in one section, trash bags in another, and any overflow storage in a third. A tension rod mounted horizontally across the front of the cabinet lets spray bottles hang from their trigger handles — this single move frees up the entire cabinet floor for larger items.
The under-sink area is also the zone most prone to moisture and leaks going unnoticed. Organizing it properly means you’ll actually see the cabinet floor regularly — which is how minor plumbing leaks get caught early before they become expensive problems.
Anything under the sink that you haven’t touched in six months should be evaluated: do you actually need it, or is it creating unnecessary crowding around your cleaning supplies? If it doesn’t have a clear purpose, it goes.
The junk drawer — yes, even that
Every kitchen has one. The drawer that started as a home for miscellaneous small items and gradually became a physical representation of entropy. Dried-up pens, mystery keys, expired coupons, batteries of unknown charge level, a charger for a phone you no longer own, menus from restaurants that closed in 2018.
The junk drawer is not inherently a problem — having a catch-all for small items is genuinely useful. The problem is when it becomes so full and chaotic that nothing in it is actually findable when you need it, which defeats the entire purpose.
The fix: empty it completely, throw away everything you haven’t used in the last year, and use drawer dividers to create defined zones for the items that earn their place. A batteries section, a takeout menu or notepad section, a miscellaneous hardware section, a tools section. When everything has a zone, things go back in the right place without thinking about it.
The rule that keeps junk drawers functional long-term: once a quarter, spend five minutes pulling out anything that’s clearly trash. Not a full reorganization — just clearing the genuine junk before it reaches critical mass again.
The 5 most common kitchen organization mistakes
1. Buying organizers before decluttering
This is the most common and most expensive mistake. Going to the store, buying matching bins and organizers, and then trying to fit your current cabinet contents into them almost always fails because you’re organizing around too much stuff rather than first reducing to what actually belongs. Declutter first. Then assess what storage solutions you actually need.
2. Organizing by category instead of by use
Putting all baking supplies together, all canned goods together, all snacks together sounds logical — but if your baking supplies are in a cabinet across the room from your oven and mixer, you’ve organized by category at the expense of function. Zone by use first; category organization lives within zones.
3. Ignoring vertical space
Most kitchen cabinets have 12–18 inches of vertical space above the items stored in them. That’s usable space that shelf risers, stackable bins, and door-mounted organizers can access. If your shelves look single-layered, you’re using roughly half the cabinet’s actual capacity.
4. Making it too complicated to maintain
An organization system that requires significant effort to maintain won’t be maintained. If putting the pan away requires removing three things, then repositioning two others, then replacing everything — you’ll stop doing it within a week. The best systems make putting things back easier than leaving them out.
5. Not involving everyone in the household
If you reorganize the kitchen solo and then expect others in the household to intuitively know where things go, the system will collapse within a week. Show people the new organization. Label shelves and bins if necessary. A system only works if everyone using the kitchen can maintain it.
The maintenance habit that keeps it all in place
Kitchen cabinets go back to chaos not because the system failed but because the reset habit wasn’t built. Individual items slowly end up in the wrong cabinet. New purchases get put wherever there’s space. The system quietly collapses over three months and you find yourself back where you started.
Two habits that prevent this:
The monthly cabinet check: Once a month, spend 10 minutes pulling everything out of one cabinet, wiping it down, and putting it back correctly. Rotate through all your cabinets over a few months. This prevents the slow drift and catches problems before they compound.
The grocery shop reset: Every time you put away groceries, take 2 extra minutes to make sure everything is going back to its correct zone. New purchases that don’t have a home yet should be assigned one immediately — not just placed wherever there’s space.
These two habits together — monthly wipe-down and grocery-day reset — take about 15 minutes of attention per month. That’s the maintenance cost of a properly organized kitchen, and it’s genuinely less work over the course of a year than reorganizing from chaos every few months.
Frequently asked questions
How long does it take to organize kitchen cabinets?
One cabinet at a time, budget about 20–30 minutes per cabinet including the declutter. A full kitchen — six to eight cabinets, plus under-sink and the junk drawer — takes most people a solid afternoon, roughly 3–4 hours. You don’t have to do it all at once. One cabinet per day over a week is just as effective and far less overwhelming.
What’s the best way to organize a small kitchen with limited cabinet space?
Small kitchens require more ruthless editing than large ones. Every item needs to genuinely earn its cabinet space. Use every inch of vertical space with shelf risers and door-mounted organizers. Consider whether items used less than once a month need to live in the kitchen at all — less-used appliances and specialty equipment can live elsewhere and free up prime kitchen real estate.
Should I label my kitchen cabinets?
For your own single-person kitchen, labels are optional — once you’ve set up the system you’ll know where everything goes. Labels become valuable when you have multiple people using the kitchen who might not remember the new organization, when you have children who are learning to put things away, or when you’re organizing a shared space like a rental property or office kitchen.
How do I keep my kitchen cabinets organized with kids?
Designate one low cabinet as the kids’ zone where snacks, their dishes, and lunch supplies live — everything they need to access independently. Keep this cabinet simple, clearly labeled, and easy to maintain. For the rest of the kitchen, focus on systems that are easy enough to use that kids can actually follow them, and accept that maintenance will need to be more regular with active young children in the household.
What products actually make the biggest difference?
In order of impact: a pull-out cabinet organizer for your pot-and-pan cabinet (eliminates the daily excavation), a pot lid organizer (solves the single most common kitchen frustration), shelf risers for upper cabinets (doubles usable space in minutes), and a matching food storage container set (ends the lid matching game permanently). Everything else is incremental improvement — these four address the most common pain points first.
Start with one cabinet today
You don’t have to do the whole kitchen at once. Pick the cabinet that bothers you most — the one you dread opening — and spend 20 minutes on it today. Empty it, edit it, wipe it down, and put back only what belongs there using the zone-by-use principle.
That one cabinet win creates momentum. You’ll open it tomorrow morning and feel good about it. And that feeling is exactly what carries you through the next cabinet, and the one after that.
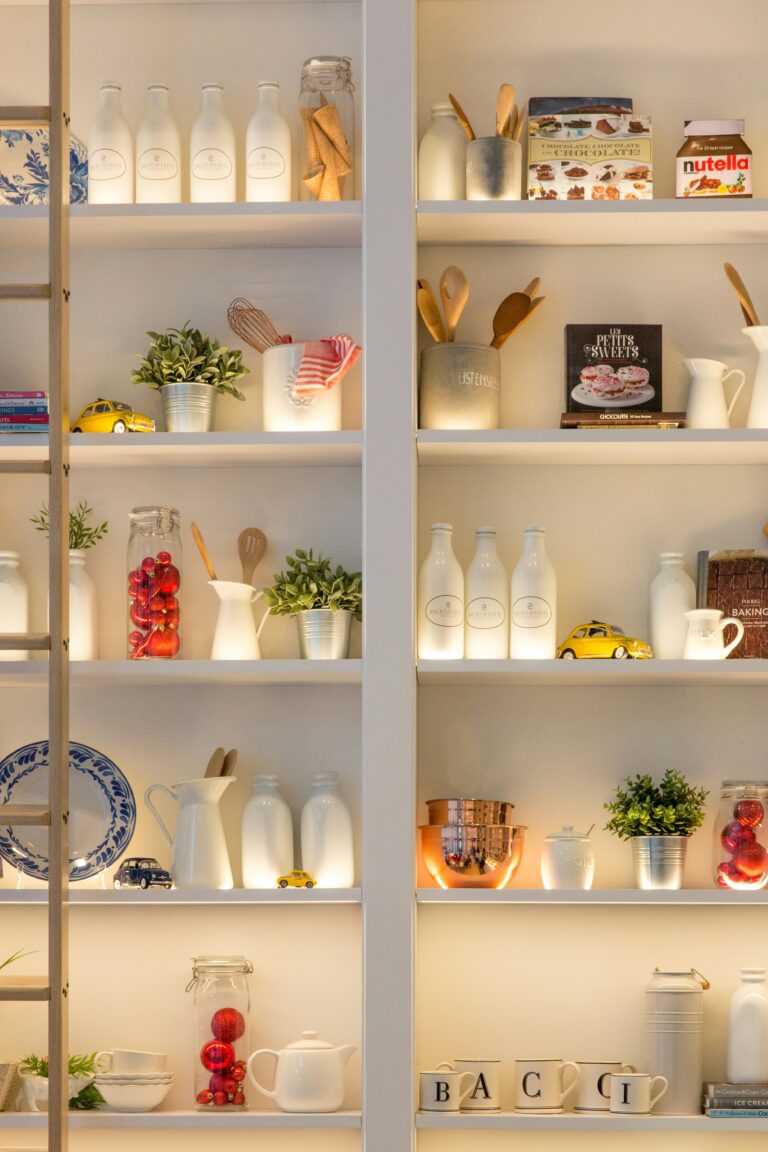
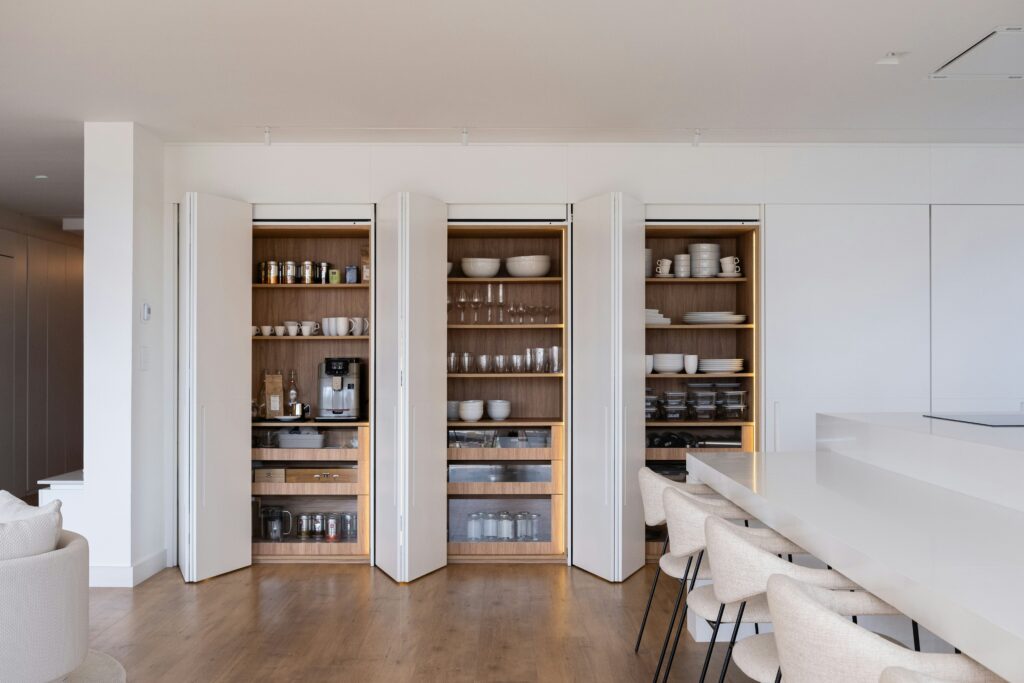
Once your cabinets are sorted, the pantry is the natural next step — and a well-organized pantry genuinely changes how you approach cooking during the week.
→ Next: Pantry Organization Ideas That Will Change How You Cook